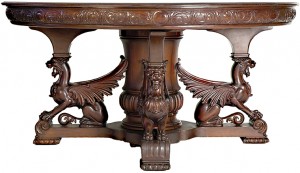
Antique table
In this article (part two of a two part series) we will discuss how to perform easy, simple repairs to damaged, or broken wood furnishings.
The most common problem with old wooden furnishings is the dehydration of glue in the attachments, and joints. This is what typically causes tables to wobble, chairs to collapse, plant stands to fall apart, and so the list goes on. Sadly, over the years many antique furnishings suffer this problem.
All too often unskilled persons make reckless repairs with improper glues, nails, and screws. A simple lesson to learn is that wood binds well with wood, and doesn’t bind well to metal, so nails and screws are very temporary, and can lead to even greater deformation of the wood, and damage to the antique.
Another common problem is damage to side, and top surfaces, scratches and dents. Here too, poor repairs are common. Usually deep scratches and dents are filled with artificial (non-wood based) fillers, and then tinted to mask the problem. Also, sometimes ornament, or actual pieces of the furnishing has broken off, and disappeared to the ages. The most typical of this is when veneer surfaces have chipped, lifted, or warped, causing a portion of the veneer to be lost.
Let’s begin by exploring how to diagnose, and make a proper repair for the following:
1) Loose Joints
2) Scratches and Dents
3) Missing Veneer/Ornament/Pieces
When repairing a loose joint, examine the joint closely. Is there structural damage to the wood? Are there any metal nails or screws involved? Is the glue brittle and broken?
First thing to do is safely remove the loosened portion (element) from the joint. If there is metal (nails or screws) remove that first. Then completely clean the joint, and all attachment points, carefully scraping away the dried old glue. If there is a portion of wood missing and needs to be replaced, this can be done by attaching a new segment of wood, to the old. For this you will need good water based wood glue. If it appears necessary to have a splint within the repair for strength, set the element into the joint with glue. Then, keeping the element and joint together, slowly drill a 1/8” hole through both the joint and element. Then slide into the drilled hole, a peg of 1/8” maple doweling. When dry, this will have created a strong and durable repair.
There are different approaches to making repairs to scratches and dents. If the scratches and dents are in solid wood (not veneer) a first attempt at the repair would be to simply ‘swell’ the wood. Wood is made up of cellulose fibers. Under a microscope, cellulose will look like tiny balloons sewn together. When wood is fresh, and healthy these balloons are full of the woods natural moisture, and oils. Antiques, being old, have pretty much dried out. By laying up a little linseed oil against the dent or scratch, the dried out cellulose soaks up the oil, swelling the wood, and the scratch or dent just disappear. If the damage is deep, another approach would be to take a thick cloth, dampened with water, lay it over the damaged area, and with a house hold iron, apply direct heat to the cloth. This will actually ‘steam’ the wood fibers swollen, and the dent will improve dramatically. This is a good remedy for scratches on wood floors as well. After the wood has swelled, if needed, you can to hide any remaining damage utilizing a traditional refinishing technique, the ‘faux finish’. There are many ‘natural wood’ types of filler available on the market today, that can easily take a stain, and detailed finish. Apply a thin layer of filler, and sand smooth after it has dried. Using stain marking pens, or stain and brush, detail the area to appear natural in color, and grain.
For repairing, or replacing missing portions of veneer, or broken off pieces of the furniture, here are a couple of good options.
For missing veneer first, check out the veneers available at your local purveyor of hardwoods, or your local lumber yard. Often you will find an inventory of the most common veneers. Find a veneer that is the same as the original veneer on the furnishing, or very close in its appearance. Then, trim it to roughly the size of the area to be repaired. Veneer can be cut with a razor (box-cutter), of matt knife. Soak the veneer ‘patch’ in isopropyl alcohol over night. This will make the material soft, without swelling the cellulose, and allow you to trim it perfectly for a drop-in fit. Water based wood glue is best, and after setting the patch in place, lay a sheet of wax paper over the patch, and lay up some weight upon it to keep the veneer patch perfectly flat and pressed down. The alcohol will rapidly evaporate, and the veneer patch will adhere to the wood glue, making a neat repair.
The best way to replace a missing piece or ornament portion of the furnishing is to fabricate a replica replacement from a similar wood. If that seems to daunting, you can get a two-part Epoxy putty at the hardware store. This putty usually is sold in stick form. Blend together two different putties, leaves you with gray or pink dough that will set rock hard in about 30 minutes. This ‘putty’ is easily sculpted when dry with either a hand, or power tool. Even a simple wood file can be used to rapidly reshape the dough into a replica of the missing ornament. Then utilizing the faux finishing technique discussed earlier, color up, and hide the repair under a matching finish.


 Auto insurance quote
 Get a Business Loan