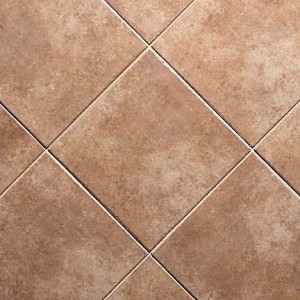
 In this, part 2 of the series, we will discuss the tools, materials, and installation procedure for building your own tile counters and walls. This is not a difficult project to perform, but experience and a good eye for detail is a must. If you would consider hiring a Contractor who has quality skills, and experience, check out Handyman Headquarters http://la-laborjobs.com/handyman/
If you choose to perform this work yourself, roll up your sleeves, and get the following:
1) Field, Corner, Edge, and Bull-nose end tile sufficient for the work.
2) Tile spacers sufficient to perform the work.
3) 5/8” or ¾” interior plywood sufficient to cover two layers of the work area.
4) ½” Cement Board sufficient to cover the work area.
5) An appropriate amount of Construction wood adhesive.
6) An appropriate amount of 1” sheet rock, or stainless screws.
7) Gloves, safety goggles
8) Box cutter, blades, ceramic tile hand saw, ceramic and wood cutting circular saw.
9) A ‘wet’ ceramic tile saw.
10) A ceramic tile hand file.
11) Glue trowel, grout trowel.
12) Drill, water, bucket, sponges, rags.
A common and simple way to produce the counter base is to lay-up two layers of interior grade, 5/8”, or ¾” Plywood.
Using good quality construction adhesive glue the two layers of plywood together. Additionally, follow through by screwing the layers together with a non-rusting screw (sheet rock screws are a good choice) being sure to set the screw heads beneath the surface of the wood.
Next you will lay on top of the plywood a product called ’Cement board’. Similar to drywall this material is available in workable size sheets, in sizes ranging from ¼” to 5/8” thickness. Typically 1/2” is suitable for most tile counter tops. Cement board is difficult to cut, and will require exacting patience if you choose to cut it by hand. Power saws can be fit with blades capable of cutting rapidly through cement board as well.
Once the cement board is cut to size, go ahead and set it on top of the plywood with construction adhesive, and screw it down as well. You will see that cement board is manufactured with divots indicating where the screws should be set to keep the screw heads from interfering with the tile setting process.
There are different tile adhesives to consider before preparing to set the tile onto the cement board. Traditionally, a product called ‘Thin-set’ has been used. This-set is basically a very fine grained mortar, water based, it is easy to mix and work with, but not necessarily the most comfortable, and clean material to work with. There are other latex adhesives which do not contain mortar. Latex adhesives are pigment free so they won’t interfere with the grout coloring. They are easy to use right out of the can (no mixing required), and are both readily available at your local hardware outlet, and inexpensive.
Which ever you choose, apply the tile adhesive with a 1/16” or 1/8” notched trowel, and only work a small area at a time. After setting the tile in position, give it a firm push into place. Any adhesive that rises up between the tiles as you set them can be cleaned up with a damp sponge.
It’s always best to set any perimeter or counter edge tiles first. Then, working back from these set the filed tiles in position. If the spacing and dimensions were considered before you began, you may have fewer tiles to cut. But should you need to cut ceramic tile, you can cut tile with a ‘dry’ *tile cutter, (not* recommended for cutting enamel finished tile) or a “wet ‘saw ceramic tile cutter; both are available to purchase, or rent.
As you place each tile, set in adjacent to the tiles edge, a ‘tile spacer’. These spacers will provide consistent dimensions between the tiles where you will be grouting later.
After the tile is set, allow it to cure in the adhesive for at least 24 hours.
Next, you can apply the grout. Most tile grout is available in a ready to mix, or pre-mixed package. Taking small amounts of grout, spread it evenly into the joints between the tiles with your grout trowel (hard rubber faced flat trowel), wiping away any excess from the tile surface. Allowing the grout to semi-dry (about an hour) using a wet soft sponge, wipe away all the excess grout remaining on the tile surface. Once this is done let it dry at least another 24 hours. After 24 hours you can remove any remaining signs of unwanted grout on the tile surface with a clean dry rag.
The final step is to seal the grout from moisture, and insure the grout will not become stained from food or beverage spills. Grout sealer is available along with all the other ceramic tile supplies you will find at your local purveyor. Following the manufacturers instructions, apply the grout sealer only after the grout has had a few weeks to complete dry and cure.
If you are looking for a professional contractor to help you with your project check out http://www.mylaborjob.com/find. It’s always free to use and you can find trusted local contractors for any kind of project.
Stay connected and informed. Like us on Facebook http://www.facebook.com/mylaborjob Special offers and insights posted regularly.


 Auto insurance quote
 Get a Business Loan