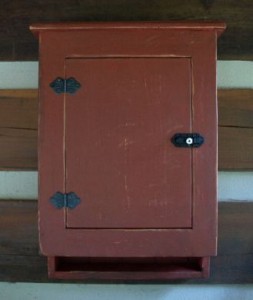
Now that we have discussed how to create texture on wooden furnishings in Part one of Creative Faux Finishing; we can address the various ways to place color on an object, creating a unique, and believable Antique effect.
In this article we will discuss the following methods of color application:
1) Antique color ‘rub-out.’
2) Antique Faux staining.
3) Antique peeled paint or broken finish.
An antique color rub-out consists of multiple layers of color, one on top of another, revealing portions of color below, or ‘base’ color.
Painted furnishings, especially antique furnishings often have been originally primed with a solid color, and then given a top coat. Over the years, from repetitive use and handling, the top layer of paint would wear away, revealing the primer. This is commonly found around drawer pulls, table top edges, and extended portions of furniture, like chair arms, or feet.
An easy approach to recreating a rub-out finish begins with color selection. Traditionally, red, or black base colors where common in American Primitive Antiques, although any color is expectable when creating a faux finish.
Using water base, solid color pigmented paint, completely paint the furnishing, being sure to let the paint saturate into any deep textured areas. When dry, apply a protective ‘sealing’ layer (water based clear coat is best). However you can also use a lacquer, shellac, or varnish, if so, spraying this on is best. Once this protective layer is dried, brush on the top color (again, color based) one section, or workable area at a time. While this coating is still wet, carefully, using a soft cloth, rub off the color gently. This will reveal the color below, and recreate the “Rub-Out” look.
This process can also be achieved after the top coat is dried, by removing the finish with steel wool, or sand paper. Keep in mind that wearing down a finish, creating a ‘Rub Out’ look will need to make visual sense. Only wear away the finish in areas that would have been naturally worn away over time.
Another great effect is ‘Faux Staining’. To create this effect, using light colored (white, yellow, off-whites, gray) solid pigmented water base paints, completely paint the object to be antiqued. After the paint has dried, using a soft cloth (white cotton fabric is best), to apply an oil based stain (of any color) to the painted object. Mop, or ‘wash’ on the stain, and wipe away the excess with the clean cloth. You will have stained the painted finish, creating a great antique look. This process is especially good for furnishings that have no particular value in either material make up, or texture. Any object that can be painted can be Faux Stained, making it instantly, “Antique”.
A peeled-paint, or broken-painted finish is created by combining techniques taken from the ‘Rub-Out’ and ‘Faux Stained” process, with one added step. This effect is very textural, and visually dramatic, and is recommended for creating objects that appear to have been left outdoors for a long period of time. This effect can also be used architecturally, on exterior structures and objects.
First select the base color to be applied to the object. Using a water based solid color pigmented (latex is fine) paint, completely cover the object. Once dry, using a plastic bucket, mix up a couple cups of dry (powdered) laundry detergent with only a small amount of water. When mixed, the detergent should have a grainy, spackle, or clay-like texture, but be moist enough to be sticky. Then using either a dry bristle paint brush, or bendable plastic trowel, throw the detergent (spatter) onto the painted object, in areas you want to reveal the base color later. The detergent should be moist enough that it sticks right to the object when it is thrown against it.
Now, leave the detergent spatter to dry over night. Next, preferably using a spray application, apply the top coat of color, also using water base (latex) solid color paint. After the top coat has dried, using a garden hose, carefully spray the object with water, directly at areas where beneath the top coat lies the detergent spatter. The spraying of water will penetrate the latex top coat rapidly, melting the detergent spatter beneath. As it washes away, the base color will be revealed. Where ever the latex top coat is laid over the latex base coat, and there is no detergent spatter, it will not wash away as easily, if at all.
Remember, it’s always best to practice a new technique on a small object before taking on a large scale project.
If you are looking for a professional contractor to help you with your project check out http://www.mylaborjob.com/find. It’s always free to use and you can find trusted local contractors for any kind of project.
Stay connected and informed. Like us on Facebook http://www.facebook.com/mylaborjob Special offers and insights posted regularly.


 Auto insurance quote
 Get a Business Loan